
SOUTHERN SOLUTION / MIDDLE TENNESSEE
THE SIDING DIAGNOSIS GUIDE
Why Does My Siding Look Worse After Pressure Washing?
Streaks, oxidation and what can be fixed
Your house was supposed to look better. Instead, the siding dried with pale stripes, chalky patches or wand-shaped marks that stand out more than the original dirt. Before you pay for another wash, identify what changed.
Opens your email app. Attach your photos and send when ready.
Or email office@southernsolutiontn.com directly.

Uneven streaks on siding, from our existing media archive. The marks show why the surface needs assessment; the image alone does not prove the cause or repair outcome.
QUICK ANSWER
Why does siding look worse after pressure washing? Washing can disturb a weathered, chalky surface unevenly, reveal fading that dirt had hidden, leave growth or detergent behind, or physically damage the finish. Oxidation streaks may improve with controlled restoration; residue and remaining growth may be cleanable; missing finish, gouges and cracked panels cannot be repaired by washing.
The deciding step is a material-specific assessment and a small test area evaluated after it dries. A photo can suggest a cause; it cannot guarantee a repair.
START HERE / THREE DIFFERENT PROBLEMS
Chalky & streaked
Possible oxidation disturbance. A test spot can show whether the finish improves.
Green or spotted
Possible remaining growth. The right cleaning depends on the surface and stain.
Gouged or cracked
Possible physical damage. Cleaning cannot replace lost material or repair cracks.
Visual patterns are clues, not a diagnosis. Multiple issues can appear on the same wall.
Siding streaks after pressure washing: what are you seeing?
A stripe describes the shape of a mark, not its cause. Oxidation disturbance and permanent finish damage can both follow a pressure washer’s path. Look at the surface condition as well as the color.
| What you notice | Possible explanation | Can it be fixed? |
|---|---|---|
| Pale arcs, chalky stripes or patchy sheen; powder transfers to a cloth | Uneven disturbance of a chalked or oxidized surface | Often improved on sound siding. Test restoration before treating the wall. |
| Green film or dark spotting, especially on shaded areas | Remaining organic growth or staining | Often cleanable with a suitable house wash. Some stains can remain. |
| Drip trails or a hazy film after drying | Detergent residue, mineral deposits or runoff staining | Depends on the deposit and finish. Identify it before choosing a cleaner. |
| Scratches, cut lines, rough tracks, cracks or exposed substrate | Physical damage or loss of the finish | Cleaning cannot replace lost material. Repair, refinishing or panel replacement may be needed. |
| Broad, persistent color differences without loose residue | Fading, previous repairs, coating failure or another discoloration | Cleaning may have limited benefit. A finish or siding specialist may be the next step. |
On a phone, swipe the comparison table sideways. These are diagnostic clues, not a remote diagnosis. Several conditions can occur on the same wall.
Photo reference: surface restoration versus a dirty wall

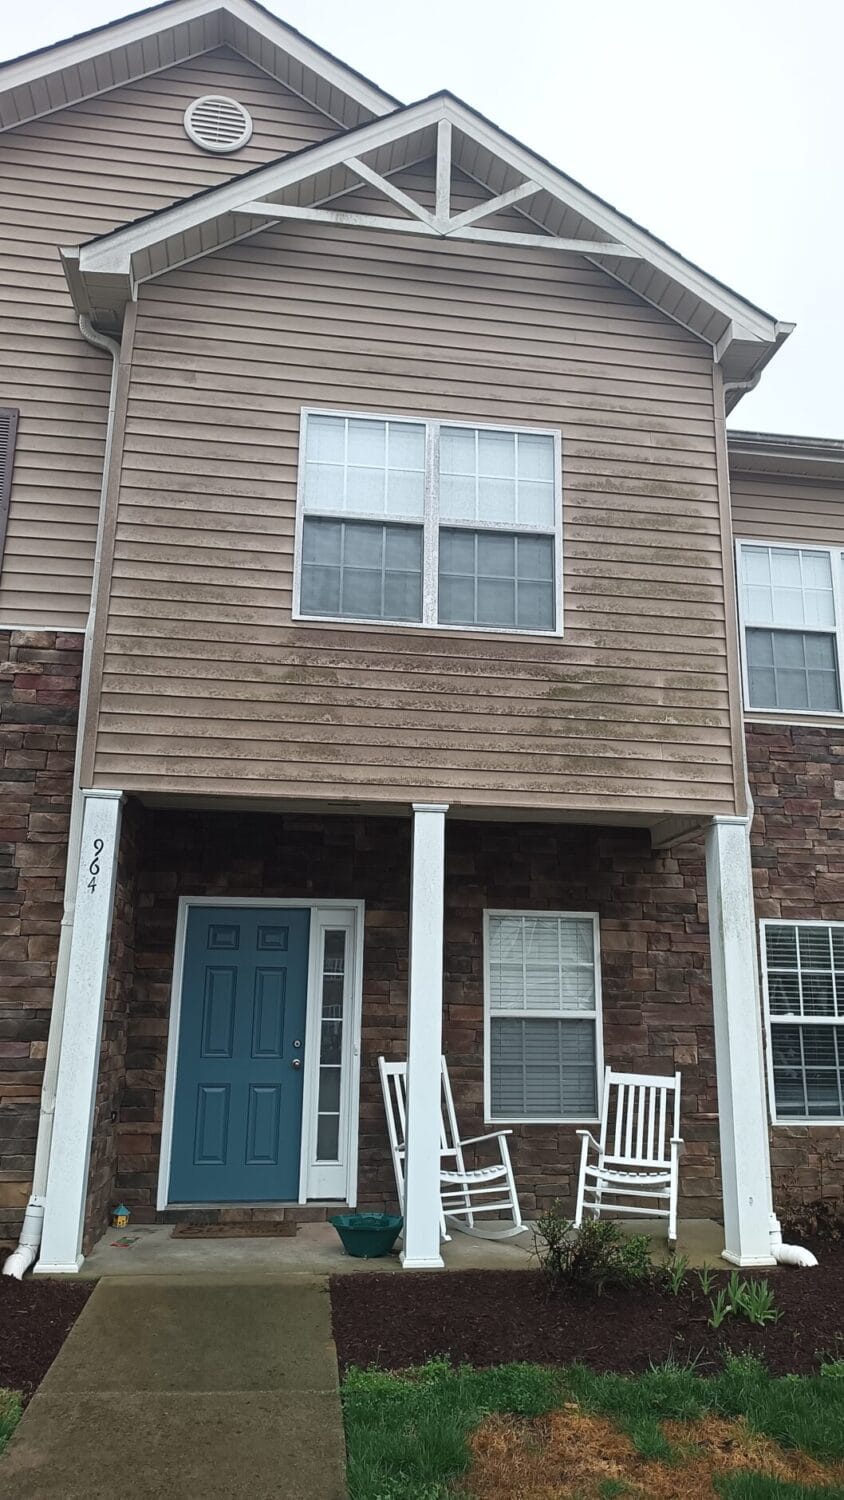
Physical damage needs a close-up. A wide house photo can hide a cut, scuff or missing coating. Photograph the affected area both straight on and from the side so texture and sheen are visible. Neither reference photo above is offered as an example of physical damage.
Why oxidation can become more obvious after washing
Outdoor finishes weather over time. On some siding, this produces a loose, chalky surface commonly called oxidation. Removing dirt can reveal that weathering; uneven brushing, detergent contact or pressure can also disturb the chalk differently across the wall.
That is why one part may look darker, glossier or cleaner while the area beside it remains pale. Wet siding can temporarily hide the difference, making the problem obvious only after the wall dries.
A small amount of chalk on a dry cloth supports a weathering diagnosis, but it does not establish how much color is recoverable. A clean cloth does not rule out fading, finish damage or another stain. Avoid rubbing a conspicuous area repeatedly: you can leave a visible test mark.
When the surface is sound, our vinyl siding oxidation removal service may improve the uneven appearance. It cannot restore pigment or coating that is already gone, and it cannot make every aged panel match a replacement panel.
Hardie board oxidation: why the sunny side can look worse after a wash
In our experience, sun-exposed Hardie board and other painted fiber-cement siding can develop chalking that becomes much more noticeable after cleaning. We have seen it often on blue and white finishes. That is an observation from our work, not a claim that every board or finish will weather the same way: the coating, exposure, age and maintenance history all matter.
It can happen during soft washing too. Low-pressure equipment is only part of the equation: an already fragile finish, unsuitable chemistry, concentrated runoff or uneven contact can leave a chalked coating looking patchy. Before cleaning, we check the surface and surrounding finishes; if oxidation is present, we discuss the condition and limitations before work begins. A normal wash targets organic growth and surface dirt, but it should not be assumed to correct the chalking.
We treat painted fiber cement as a coated surface, not as interchangeable with unpainted vinyl. If the finish is failing or the test area suggests further treatment could make things worse, cleaning cannot replace the lost coating. Check the specific siding and coating instructions. James Hardie advises against pressure washing its siding, because it can damage the surface, and recommends low-pressure water and a suitable soft brush for routine care.
Why gutters can still look dull after cleaning
The outside face of a gutter can have the same weathered, chalky appearance. Washing may remove algae, mildew and ordinary dirt while leaving oxidized paint or coating behind; the gutter can be clean and still look flat or streaky. Dark runoff lines and mineral staining may have other causes, so appearance alone does not identify the problem.
Oxidation work on gutter exteriors is a separate assessment from cleaning debris out of the gutters or washing away surface growth. Painted gutter finishes can be thin or weathered, so we check the condition and test an inconspicuous area before recommending restoration. If too much finish is already gone, cleaning cannot put it back.
What if it is leftover algae, mildew or rinse residue?
Green film and dark spotting can indicate contamination left behind, particularly below trim, under eaves or on shaded walls. Appearance alone cannot identify the organism or prove whether a previous treatment worked. The finish, moisture pattern and cleaning history all matter.
Haze and drip lines are less specific. They may involve detergent, minerals, material washed down from above, or a weathered finish. A stronger chemical mix is not a reliable diagnosis and may create additional discoloration.
If growth and ordinary soil are the problem, a low-pressure house wash may be appropriate. Oxidation correction is a separate scope of work. Treating the green film does not automatically even out a chalked finish.
When pressure washer marks are permanent damage
Visible grooves, chipped coating, roughened tracks, split panels and exposed material are reasons to stop cleaning. A wash can remove a deposit; it cannot put a finish back on or close a crack.
Painted aluminum, painted fiber cement, wood and vinyl need different assessments. On painted siding, removing more chalk can reveal an already weakened coating. On brittle vinyl, further handling can worsen a crack. Do not assume that a method used successfully on a neighbor’s vinyl is suitable for your home.
Manufacturer instructions should guide the approach. CertainTeed’s vinyl siding care guidance, for example, warns that power washing can cause moisture intrusion, damage or discoloration and recommends testing cleaners in an inconspicuous area. Check the guidance for your specific product.
FROM THE FIELD / SOUTHERN SOLUTION
Oxidation removal is controlled surface restoration
We have handled quite a few oxidation jobs, and the part homeowners do not always see is how much control the process takes. On a painted surface, the chalk can be part of the weathered coating itself. Remove too much and you can take sound paint with it. Unpainted vinyl is different: you are dealing with the weathered surface of the siding, not necessarily a paint layer.
We test a discreet area and adjust the product and strength to the material and its condition. The goal is to remove the damaged, chalky layer without needlessly attacking sound material underneath. A stronger mixture is not automatically a better one, and a test spot has to dry before we can judge the color and finish.
Many jobs involve careful hand scrubbing, often in multiple passes. We watch how the surface responds as we work and protect nearby finishes and landscaping. Oxidation removers can affect paint, metal, glass or other materials if the wrong product is used or it is allowed to contact an unsuitable surface. We follow the product and siding manufacturer’s instructions for protection, rinsing, and neutralization when the specific product or process calls for it.
What does it typically cost? Many of our oxidation jobs run around $750 for one side of a house. That is a practical reference, not a fixed price: wall area, height, access, siding condition and the number of passes all affect the quote. After reviewing your photos, we can determine whether an on-site assessment and test spot are needed before providing a price.
Our existing oxidation removal page also provides a square-foot pricing guide; both figures depend on the affected wall area and job conditions.
What an assessment and test spot establish before quoting
A useful assessment answers two separate questions: what is on the siding, and what condition is the siding itself in? We start with the material, visible defects, the affected wall area and what happened during the previous cleaning.
- Document the starting condition. Photograph the dry wall, including close-ups, existing chips and the transition between marked and unmarked areas.
- Choose a small, discreet test area. Confirm the proposed treatment is suitable for the material and its finish. Get agreement on its location because a test can leave a visible difference.
- Use controlled treatment. Assess whether the suspected deposit or chalk responds without unacceptable changes to the underlying surface.
- Let it dry. Compare color, sheen, remaining marks and surface condition under similar lighting. A darker wet patch is not proof of restoration.
- Define the scope and limits. Establish whether an entire elevation needs treatment to reduce patchiness, what improvement is realistic and which defects will remain.
A test spot shows how that particular area responds. It does not guarantee that every panel will react identically or prove that the wall assembly behind the siding is dry. Height, access, condition and treatment area determine the quote; your home’s interior floor area alone does not describe the restoration work.
From our work: oxidation on warehouse doors and a metal roof
These are two Southern Solution project images you can compare with the symptoms on your property. They show different materials and different kinds of work; neither predicts the result on another building.

We removed oxidation from the warehouse doors and washed the building. The top photo shows the earlier condition and the bottom shows the result. The photos were taken from different angles and in different light, so use them as project context rather than an exact color comparison.

In the lower photo, the left side is oxidized and the right side is restored. The same need to evaluate the coating and select an appropriate treatment applies to painted metal siding. This image documents a roof, not a siding project.
Neither photo records the full earlier cleaning history or the exact treatment and number of passes used, so we do not infer those details. A small dry test section is still the best way to assess what may be achievable on your own surface.
What a real restoration photo can tell you
The chalk-check photo above is already used on our service page. It illustrates why surface residue matters, but an image alone does not establish the previous washing method, the original condition of every panel or a final dry restoration outcome.
For your own assessment, ask to compare the original dry condition, the test treatment and the dry result. Keep any earlier photos and the previous contractor’s description of the work. Those records help distinguish a pre-existing finish problem from a new change and keep expectations tied to your siding.
For more examples of our exterior cleaning work, see our Middle Tennessee project photo gallery. Results on another property are a reference, not a promise for a different material or finish.
What to do now if your siding looks worse
- Pause further pressure washing and scrubbing. Avoid trying to blend stripes with a closer nozzle, abrasive pad or stronger cleaner.
- Let the wall dry fully. Photograph it in even daylight rather than judging only a wet surface or deep shadow.
- Record the cleaning history. Note the date, products and method if known, and whether marks appeared immediately or after drying.
- Send wide views and close-ups. Include the whole elevation, the worst marks and a nearby unaffected area.
If you notice water inside after washing, deal with the moisture problem first and have the entry point assessed. Cosmetic cleaning is a separate issue.
THE SIDING DIAGNOSIS GUIDE / SOUTHERN SOLUTION
A closer look at siding streaks
A visual guide to the signs, the possible causes and the next step.
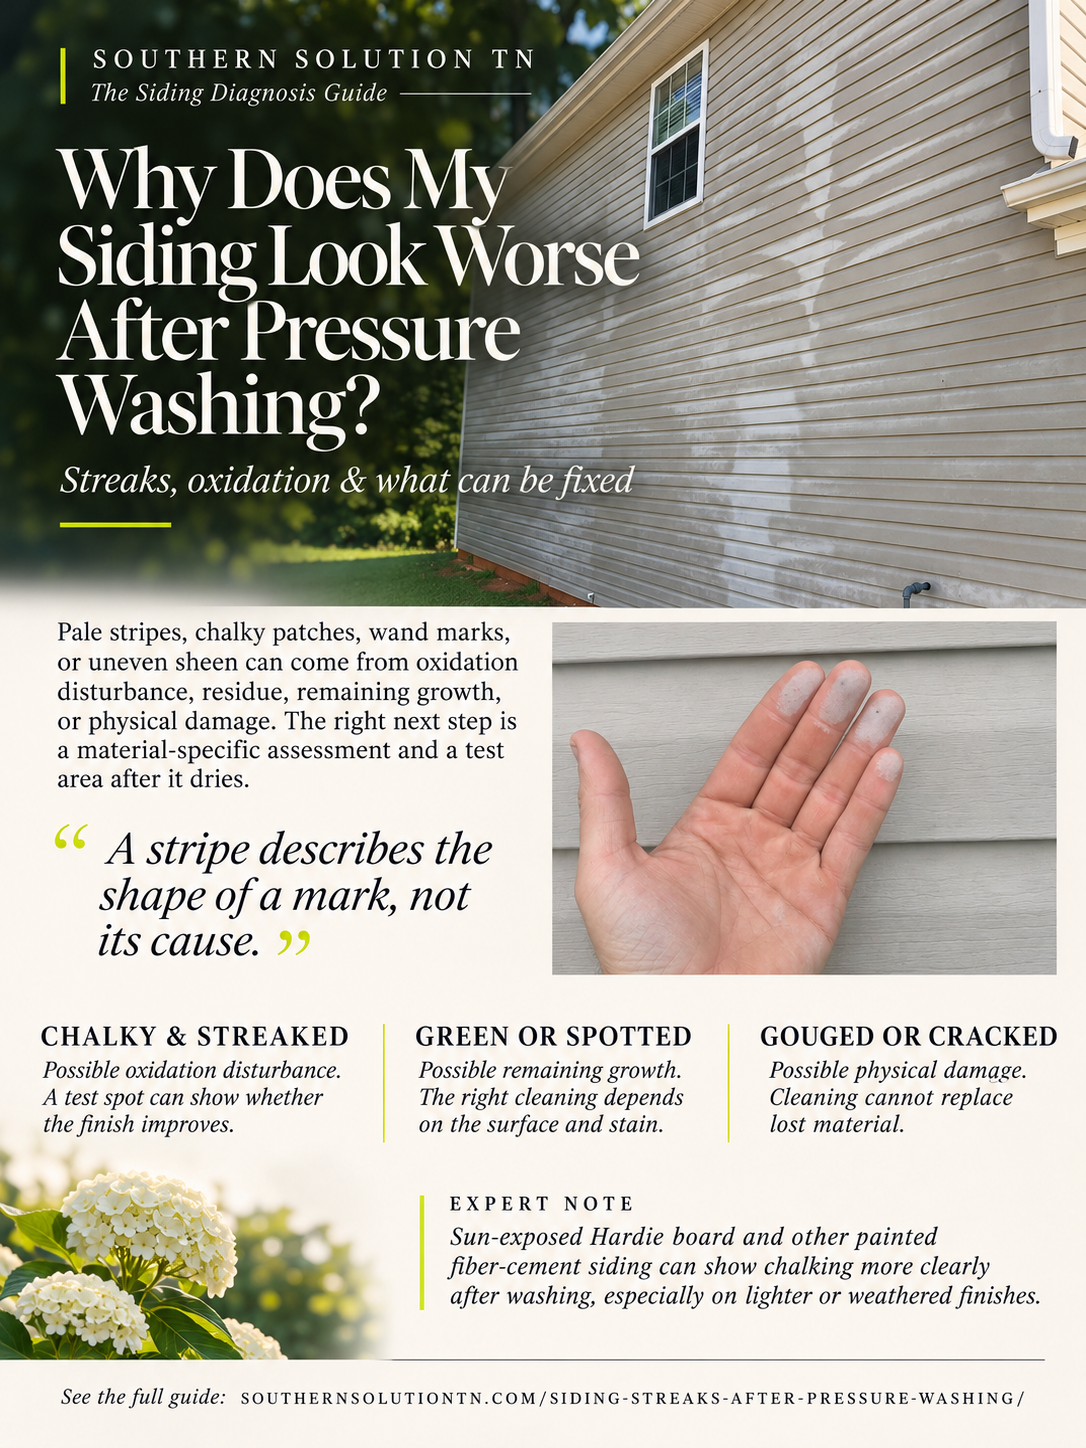
Send photos of the streaks for an assessment
Southern Solution helps homeowners across Nashville, Franklin, Brentwood, Bellevue, Dickson and surrounding Middle Tennessee communities identify the right next step for streaked or chalky siding.
Attach three to five photos, your city, the siding material if known and a short description of the previous wash. We will review the visible symptoms and explain whether an on-site assessment or test spot is needed before quoting.
Email: office@southernsolutiontn.com
Tap to open your email app, then attach your photos and send your message. You can also copy the address into your own email.
Prefer text? Text photos to 615-593-8069. Attach your photos in your messaging app before sending.
You can also request an assessment through our quote page or call 615-593-8069.
These links open your own messaging or email app; photos are not uploaded through this page and are not sent until you attach and send them. Photo review is an initial assessment; treatment and results depend on the material and condition.
Frequently asked questions
Can pressure washer stripes be removed from vinyl siding?
Sometimes. Stripes caused by uneven chalk disturbance may improve with suitable oxidation removal. Stripes involving gouges, lost finish or permanent discoloration need a different solution. A dry test area helps establish the difference.
Did washing cause the oxidation?
Weathering develops over time. Washing can expose or disturb an already chalked surface, but it can also cause new damage. The fact that marks appeared after washing does not identify their cause by itself.
Will another soft wash fix chalky siding?
A standard house wash targets soil and organic growth. It may leave oxidation and uneven finish visible. Tell the contractor about the chalk and previous wash before agreeing to another cleaning.
Why does my siding look fine wet and streaky dry?
Water changes how light reflects from the surface and can temporarily mask uneven weathering or residue. Judge a test treatment only after the surface dries.
Can bleach fix oxidation streaks?
Increasing bleach strength is not an oxidation repair plan. The right approach depends on the siding and finish, and excessive concentration can cause damage. Identify the issue and follow product and siding manufacturer guidance.
Do I need new siding?
Chalkiness alone does not establish that replacement is needed. Sound siding may respond to restoration. Cracking, brittleness, missing finish and persistent discoloration can limit the result and may call for repair or refinishing.
Prepared by Southern Solution for Middle Tennessee homeowners. Photo references: Southern Solution’s oxidation service page and project gallery. Manufacturer reference: CertainTeed’s vinyl siding care guidance. This article focuses on diagnosis; treatment must match the specific siding and finish.